Blog Archives

Fresh Fruit & Cream Sponge Cake
Weekend Baking Inspo…

Fresh Fruit & Cream Sponge Cake
This vanilla cake is quite an easy cake to make. A simple yet delicious 2 layer sponge cake which can be used for any occasion. I used homemade strawberry compote to sandwich the cake and for the topping.
From My Kitchen To Yours – keeping our heritage alive since 2011!
Ingredients:
1 cup castor sugar
4 large eggs
1 cup cooking oil
2 tsp vanilla essence
1½ cups cake/plain flour
1 cup self raising flour
2 tsp baking powder
½ cup milk
300ml fresh cream, whipped (1 tub)
Strawberry compote**
Fresh seasonal fruit


Method:
Preheat oven to 180°C.
Grease 2 x 20cm baking tin with butter or oil, dust the baking tins with flour or line the tins with greaseproof paper.
Cream eggs, sugar and oil until light and fluffy or until sugar has dissolved. Add vanilla essence. Add flour and baking powder and stir well. Stir in milk and mix to combine until the mixture is a smooth dropping consistency. Divide the mixture between the two prepared tins and bake for 20 – 25 minutes. To check if cake is done insert a skewer in the middle of the cake, if it comes out clean it is done. Allow to cool slightly, turn out into a cooling rack to cool down completely. Sandwich the cakes together with strawberry compote and some of the whipped cream. Pipe fresh cream around the edge of the cake, fill the centre of the cake (inside the cream)
Decorate with slices of fresh fruit. I used strawberries, figs, passion fruit, kiwi and blueberries.
To make the strawberry compote
1 Tbsp maizena /cornstarch
3 Tbsps warm water
500g strawberries, hulled and sliced in half (you can also use frozen, no need to thaw)
zest and juice from ½ small lemon
¼ cup sugar
Method:
Mix the maizena with the warm water until dissolved.
Add the strawberries and all the other ingredients in a pot.
Simmer for about 10 minutes over low heat.


Cool completely before using. It will thicken up as it cools down. Store in an airtight container for 1 week in a refrigerator.
Follow this link to view our catalog on WhatsApp: https://wa.me/c/447704107431 (only available for collection or delivery in the UK)
Read my latest online magazine here Salwaa’s Cape Malay Magazine

330th anniversary of the arrival of Sheikh Yusuf of Macassar to South Africa.
Our Cape Malay Heritage
Today marks the 330th anniversary of the arrival of Sheikh Yusuf of Macassar to South Africa.
If you see some people in the Cape Malay community today packing their picnic baskets with samoosas, koeksusters, boeber, rose water and dates it is most probably because they’re going to be having Iftar (breaking of the fast) today in Macassar.
Macassar is a small suburb between Strand and Somerset West in the western Cape. The small fishing village is hardly paradise but it has a legendary tale which will be told by its inhabitants that Moses parted the waters, Jesus walked on the waters but that it was Sheikh Yusuf of Macassar who put his foot in the salty sea waters and it turned into fresh waters that the sailors on board the Voetboog could drink when they were sailing to the Cape of a Good Hope. Sheikh Yusuf of Indonesia was exiled in the Cape by the Dutch East India Company in 1693
The story about Sheikh Yusuf of Macassar is one that will be celebrated today by lots of Cape Town aunties and their families who will be visiting his shrine in the Western Cape. In a booklet, “Guide to the Kramats of the Western Cape.”, edited by Mansoor Jaffer and published by the Cape Mazaar the voyage of the Voetboog sailing to the Cape was not without its challenges. Jaffer writes, “The voyage to the Cape was not without mysterious events. En route the fresh water supply became depleted and being far away from land, this caused deep concern. When Sheikh Yusuf came to hear of this, he merely put his foot in the sea, and told the men to let down the casks in that spot. When they pulled up the casks, they discovered, to their amazement, that the water was fresh and perfectly good to drink. It could have been that the Sheikh knew that they were near one of the fresh water currents of the coast of Natal. If so, it clearly displays the extent of his exceptional knowledge. Nevertheless, the legend lives on in the oral history of the community and is related with great pride by those who believe in his mystical powers.”
Today marks 330 years when the Voetboog sailed into the Cape of Good Hope in 1694 with Sheikh Yusuf; and his “mystical powers” continued to rein for the five years during which he was exiled here and during which time he contributed to a phenomenal spread of the Sufi school of Islam that was rooted in stoicism of personal & political ideals, tolerance for others and a marriage between science, art, politics and spirituality.
Sheikh Yusuf was a spiritual and political teacher to many of the slaves in the Cape. In 2005 the South African government honored Sheikh Yusuf posthumously with the National Order of the Companions of O. R. Tambo in Gold for his contribution to the struggle against colonialism.
Sheikh Yusuf died in 1699, just five years after his arrival at the Cape, and more than three centuries later his memory continues to live on with significant numbers of people who pay homage at his shrine in Zandvliet (now known as Macassar to honour the place where he was born).
Written by Ismail Raeesa and share by Mogamat Kammie Kamedien


Recipe for 100 Koesisters

Traditional Cape Malay Koesisters are sweet spicy doughnut like balls of goodness. The big difference though is that koesister are loaded with earthy warm spices. Some of the ground spices used are cardamom, cinnamon and aniseed amongst others.
Koesisters are traditionally eaten on Sundays for breakfast although it can and will be enjoyed at any time!
Unsyruped koesisters can be frozen, defrost when needed and syrup following my video here.
I find grinding whole spices gives a delicious rich flavour to koesisters. If you’re not able to grind your spices, then I would suggest buying enough to use immediately or store your spices in an airtight container in the freezer to preserve the flavours. You’ll find all the spices readily available from your local supermarket or spice shop.
Save your satsuma / naartjie peels, dry it out in the oven or sun (if you lucky to live to live where it hot most of the time) and grind it into a powder.
A few tips; set enough time aside for the whole process. This will take a whole morning or afternoon from start to finish. Whilst the dough is rising you can watch your favourite tv show or a movie or catch up with my video tutorials, lol!
I’ve been asked many times to share my recipe for making koesisters in bulk. So here follows my recipe.
This is a good way of generating an extra income for you, working from home. Spread the word and start selling koesisters in your area!
Remember, you’ll need an extra large bowl for mixing.
Ingredients to make 100 Cape Malay Koesisters
2kg cake / plain / all purpose flour
3 heaped tablespoons ginger powder
3 heaped tablespoons cinnamon powder
4 teaspoons cardamom powder
6 tablespoons aniseed powder
3 tablespoons whole aniseed
4 level teaspoons mix spice
4 teaspoons ground naartjie / satsuma peel
4 packets instant yeast (7g or 10g)
2 cups sugar
1 teaspoon salt
4 eggs
1/2 cup cooking oil
4 cups hot water
2 – 2½ cups milk
3 litres oil for deep frying
Method:
Add and mix all the dry ingredients into a very large bowl.
Measure and mix the wet ingredients in a separate bowl.
Add the wet ingredients into the dry ingredients. Mix well until a soft dough forms.
Cover with plastic wrap and set aside in a warm place to rise until double in size.
When the dough has risen, pour some oil into a plate or bowl. Dip your fingers into the oil to prevent the dough from sticking to your hands. Divide the dough into small pieces, the size of a golf ball, approximately.
You’ll get about 100 – 108 pieces of dough. Roll the dough into smooth balls and place onto a lightly oiled surface.
Allow the koesister balls to rise until double in size. Meanwhile, heat the oil in a large pot or saucepan. Once the oil is hot and the koesisters have risen, turn the flame lower to medium/high.
Gently pull the koesister balls into an oblong shape and fry until browned, about two minutes on each side. Remove from the oil using a slotted spoon and drain on absorbent kitchen paper.
Watch my video tutorial for more tips and to see my method.
If you like my work or the free stuff on this website and want to say thanks, or encourage me to do more, you can buy me a coffee by clicking here⤵️
SUBSCRIBE ► https://youtube.com/c/capemalaycooking
————————————————————————
ADD ME ON:
Facebook: https://www.Facebook.com/capemalaycooking
Instagram: https://Instagram.com/capemalaycooking
Pinterest: https://Pinterest.com/capemalaycooking
Tiktok: https://tiktok.com/capemalaycooking0
Website: https://www.capemalaycookingdelights.com
Online Shop: https://capemalaycookingdelights.com/merchandise/

No-Bake Oreo Cheesecake
Salwaa’s No-Bake Oreo Cheesecake
Salwaa Smith – Cape Malay Cooking & Other Delights
From My Kitchen To Yours – keeping our heritage alive since 2011!

A rich and creamy cheesecake to make during the holidays or just anytime to spoil family and friends.
Ingredients:
24 Oreo biscuits
4 tbsp of melted butter
250g cream cheese, at room temperature
6 tbsp icing sugar
1/2 tsp of vanilla essence
2 x 250 ml of fresh cream, chilled
3 tsp gelatin, dissolved in 3 tablespoons of hot water
Method:
In a mixing bowl, finely crush 16 of the oreo biscuits. Add the melted butter and stir to combine. Add it to the bottom of a 24 cm spring form pan. Press the biscuit mixture lightly down with the back of a spoon or spatula.
Add the cream to a mixing bowl and whip until it is thick. In another bowl add the cream cheese, vanilla essence and icing sugar. Mix until combined and creamy. Add the whipped cream as well as the gelatin.
Break 4 of the oreo biscuits into piece and fold it into the mixture.
Add the cream cheese mixture on top of the oreo base and smooth the top. Top it with the remaining oreo biscuits.
Refrigerate until set, 4 – hours or preferably overnight.
If you like my work or the free stuff on this website and want to say thanks, or encourage me to do more, you can buy me a coffee by clicking here⤵️
SUBSCRIBE ► https://youtube.com/c/capemalaycooking
————————————————————————
ADD ME ON:
Facebook: https://www.Facebook.com/capemalaycooking
Instagram: https://Instagram.com/capemalaycooking
Pinterest: https://Pinterest.com/capemalaycooking
Tiktok: https://tiktok.com/capemalaycooking0
Website: https://www.capemalaycookingdelights.com
Online Shop: https://capemalaycookingdelights.com/merchandise/

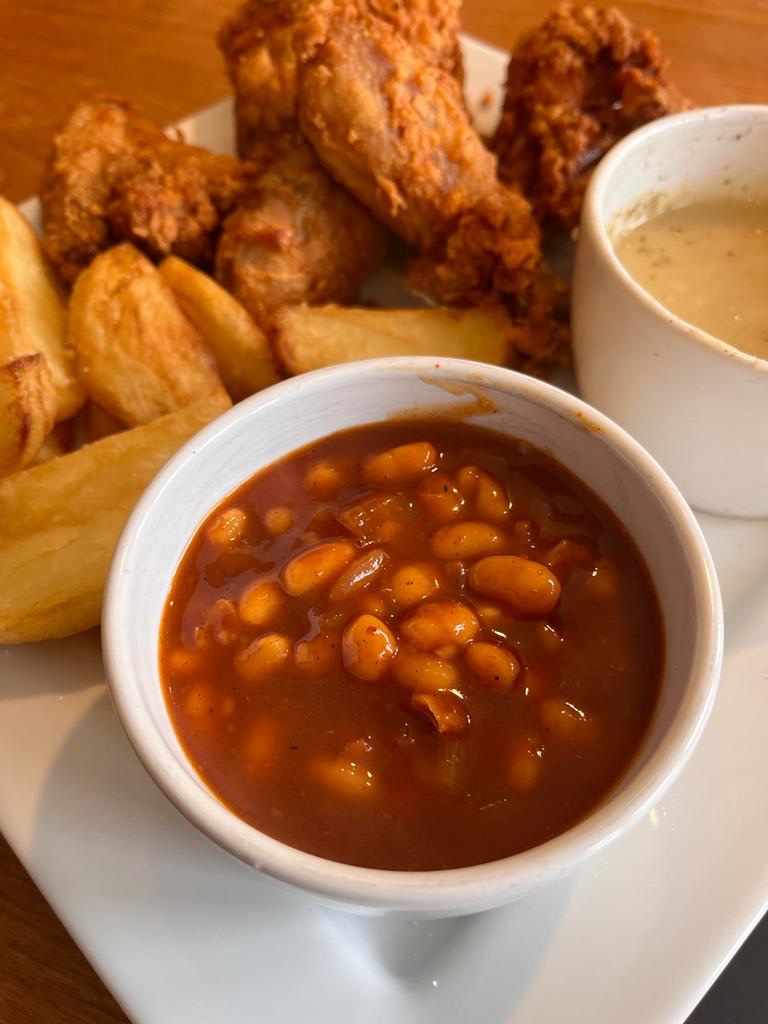
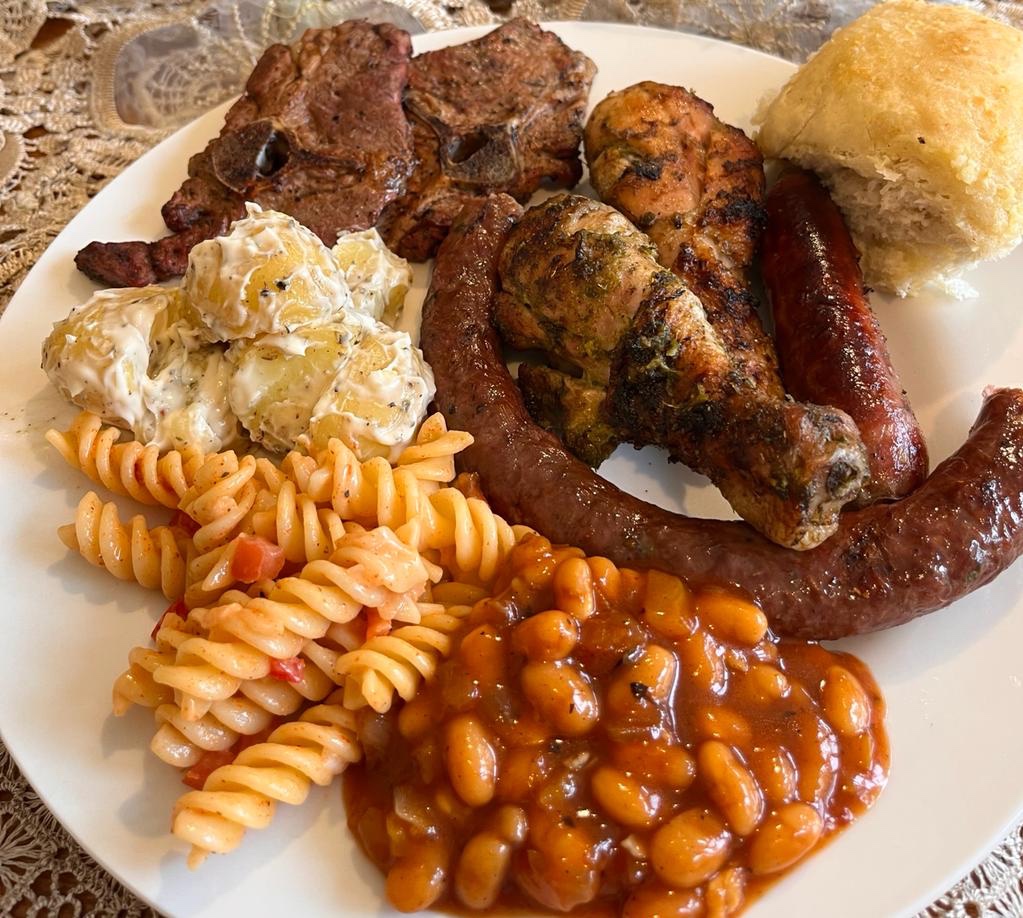
Baked Beans Salads
Here’s two versions of my popular baked beans salads which I always serve as a side dish when braaing (bbq’ing)
I often served baked beans salad with crispy fried chicken as well. Makes a filling and delicious accompaniment.
My kids enjoys the left over baked beans salad on toast for breakfast as well. It even taste better the next day!
Recipe One:
Salwaa’s BBQ Baked Beans
Sauté one medium chopped onion in little oil.
Add a finely chopped cloves of garlic
Add 1 tin of baked beans
1 heap teaspoon BBQ / braai spice
1 teaspoon smoked paprika
2 tablespoons BBQ / brown sauce
2 tablespoon Mrs Balls sauce (original or Jalapeño flavour)
Mix well and simmer for 10 minutes on medium heat.
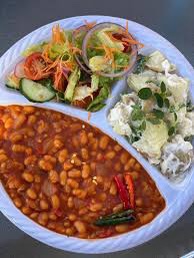
Recipe Two:
Sweet and sour bean salad. Serve as a side with braai (BBQ) or as a light meal with toast.
Ingredients:
1 tin (410g) baked beans
1 Tbsp oil
1 small onion, peeled and finely chopped
1/2 green pepper, finely chopped
2 cloves garlic, grated
1 – 2 green chillies, finely chopped
1 tsp roasted masala / leaf masala
½ tsp turmeric / borrie
3 Tbsp chutney (Mrs Balls or similar)
1 Tbsp vinegar
1 tsp sugar (optional)
#capemalaycooking
Method:
Heat the oil in a deep medium size saucepan. Add the onions, sauté. Cook until light golden brown. Add the green pepper, garlic, roasted masala, turmeric and cook for 1 minute adding a bit of water if necessary to prevent it sticking.
Add the remaining ingredients including the baked beans. Stir and warm over medium heat. Serve as a side with braai or on a slices of toast.
Variation: Use smooth apricot jam instead of the chutney.
If you like my work or the free stuff on this website and want to say thanks, or encourage me to do more, you can buy me a coffee by clicking here⤵️
SUBSCRIBE ► https://youtube.com/c/capemalaycooking
————————————————————————
ADD ME ON:
Facebook: https://www.Facebook.com/capemalaycooking
Instagram: https://Instagram.com/capemalaycooking
Pinterest: https://Pinterest.com/capemalaycooking
Tiktok: https://tiktok.com/capemalaycooking0
Website: https://www.capemalaycookingdelights.com
Online Shop: https://capemalaycookingdelights.com/merchandise/

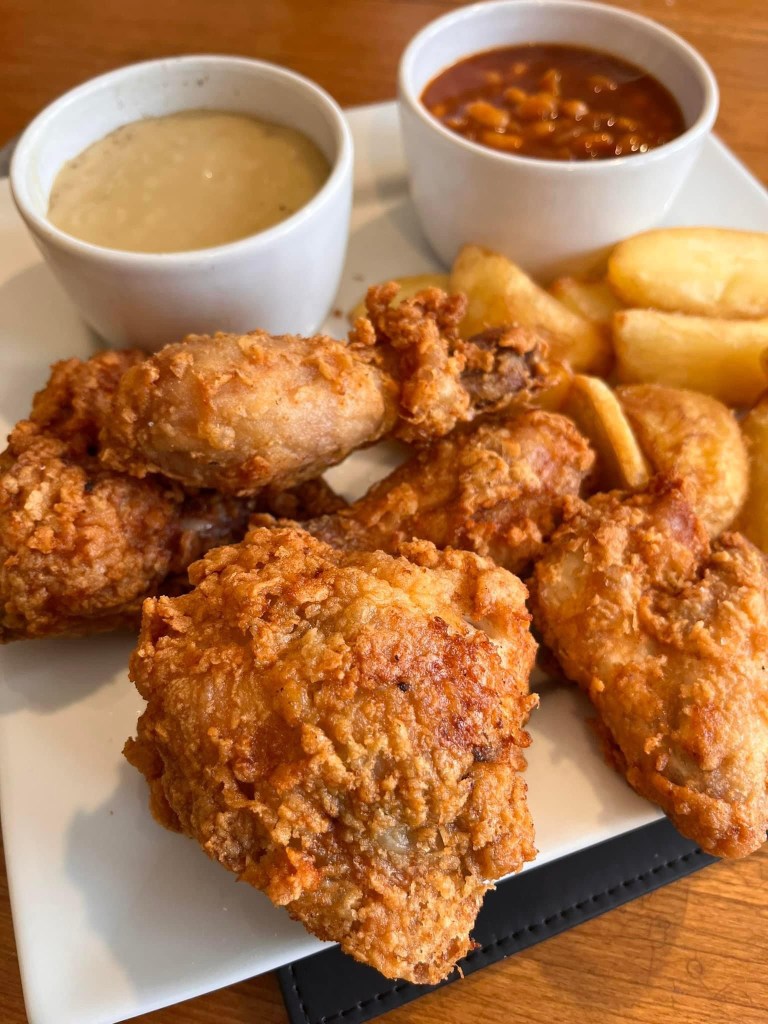
Crispy Fried Chicken
Next level crispy fried chicken recipe which is an absolute must to try!
Salwaa Smith – Cape Malay Cooking & Other Delights
From My Kitchen To Yours – keeping our heritage alive since 2001!
The secret to making juicy fried chicken is to try and cut the chicken into even size pieces. Cut the breast pieces into 2 or 3. Smaller breast pieces will have similar cooking time as the legs and thighs.
Marinade the chicken at least 4 hours or overnight. Don’t rush this step.
Season generously.
Leave the chicken to rest after it’s been breaded in order for a crust to form. I usually leave mine for at least an hour before frying.
Use a heavy based pan for frying with a few centimetres of oil. No need for deep frying.
Don’t ruin your crispy chicken by placing the finished product on a layer of paper towels. The paper can cause the chicken to steam, making the crispiness go soggy. Instead, cover a baking tray with a wire rack. Transfer each fried chicken piece onto the wire rack. The excess oil will drip off the rack onto the tray without loosing any of the crispiness.

Ingredients
1 whole chicken cut into pieces, see tip above
Sunflower oil, for frying
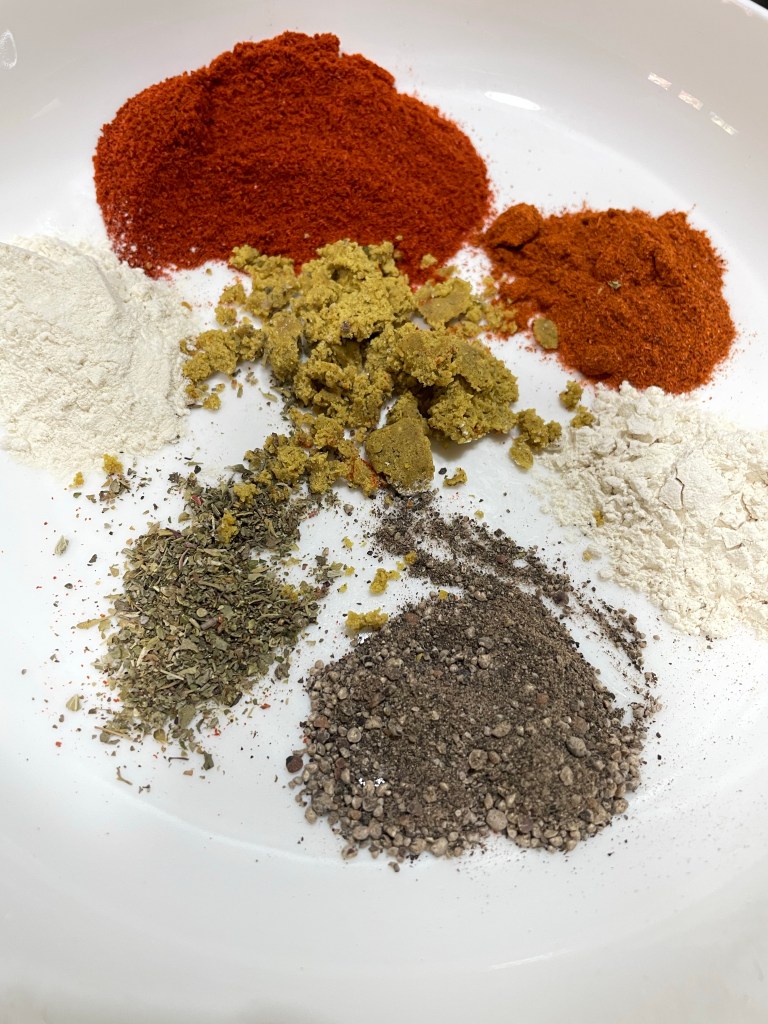
For the spice mix
2 tbsp paprika
2 tsp garlic granules
2 tsp onion powder
1 tsp chilli powder
1 tsp black pepper
½ tsp dried mixed herbs
1 chicken stock cube, crumbled
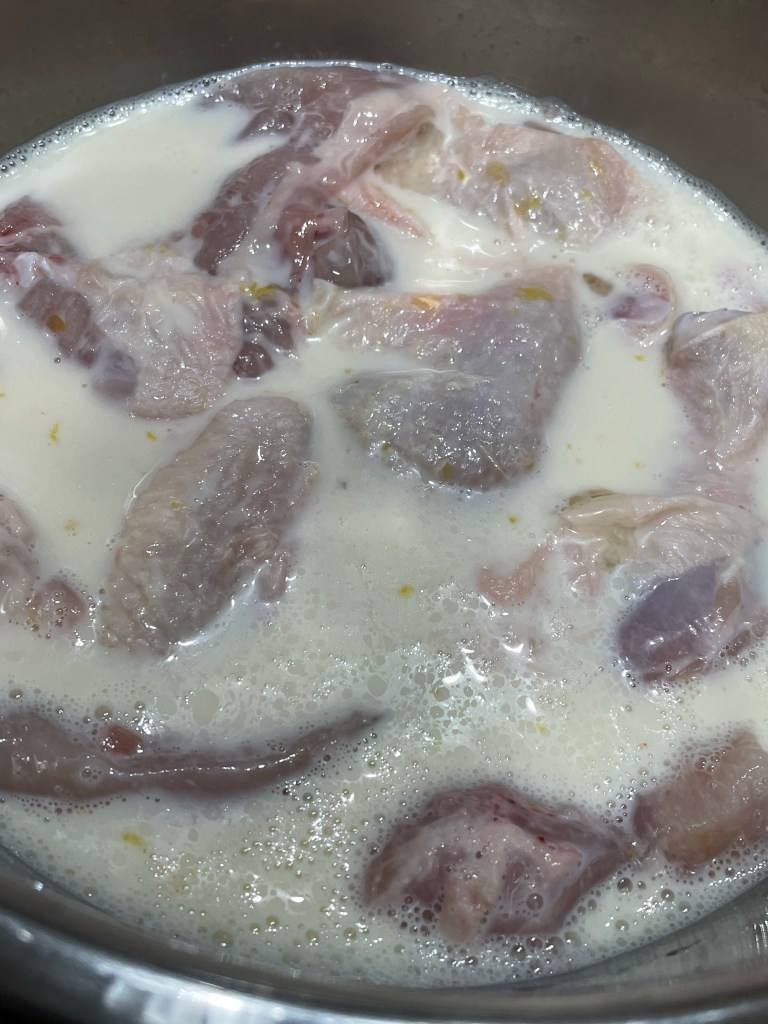
For the buttermilk marinade
2 cups milk
2 tbsp white or brown vinegar
1 egg
1 tsp salt
For the coating
1 cup self-raising flour
1 cup cornflour / maizena


Method:
In a small bowl, mix all the dry spices together.
Whisk the milk with the vinegar, egg, 1 teaspoon salt and 1 tablespoon of the spice mix in a bowl to make the buttermilk marinade. Add the cleaned chicken pieces, mix well and cover with plastic wrap. Refrigerate for at least 4 hours or overnight.
When you’re ready to fry your chicken, make the coating by combining the flours with the remaining spice mix.
Drain the chicken pieces, reserving the marinade. One by one, dredge each piece of chicken in the flour, then dip in the reserved marinade, then dredge again in the flour, pressing on as much as you can to coat. Transfer the coated thighs to a large tray. Refrigerate for an hour for the coating to form onto the chicken.
Heat a 10cm depth of oil in a heavy based saucepan or deep-fat fryer until it reaches 175C. Gently lower 3 to 4 pieces of chicken into the oil. Don’t overcrowd the pan.
Fry over medium heat about 5 minute a side. Don’t be tempted to turn the chicken in the first 3 minutes. Leave to cook undisturbed, cook until it’s a deep golden colour and crisp on the outside.
Remove from the oil onto your wire rack. Sprinkle the fried chicken with sea salt, serve with a fresh garden salad, rice or chips.
On this occasion I served my fried chicken with BBQ baked beans and a gravy.
If you like my work or the free stuff on this website and want to say thanks, or encourage me to do more, you can buy me a coffee by clicking here⤵️
SUBSCRIBE ► https://youtube.com/c/capemalaycooking
————————————————————————
ADD ME ON:
Facebook: https://www.Facebook.com/capemalaycooking
Instagram: https://Instagram.com/capemalaycooking
Pinterest: https://Pinterest.com/capemalaycooking
Tiktok: https://tiktok.com/capemalaycooking0
Website: https://www.capemalaycookingdelights.com
Online Shop: https://capemalaycookingdelights.com/merchandise/

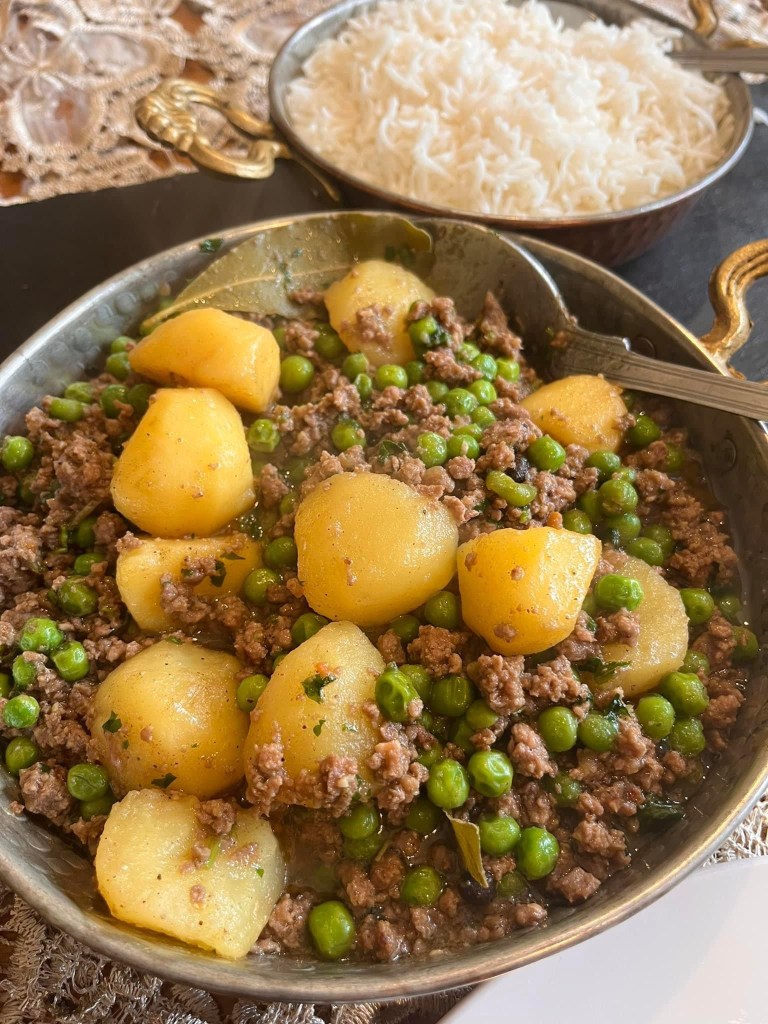
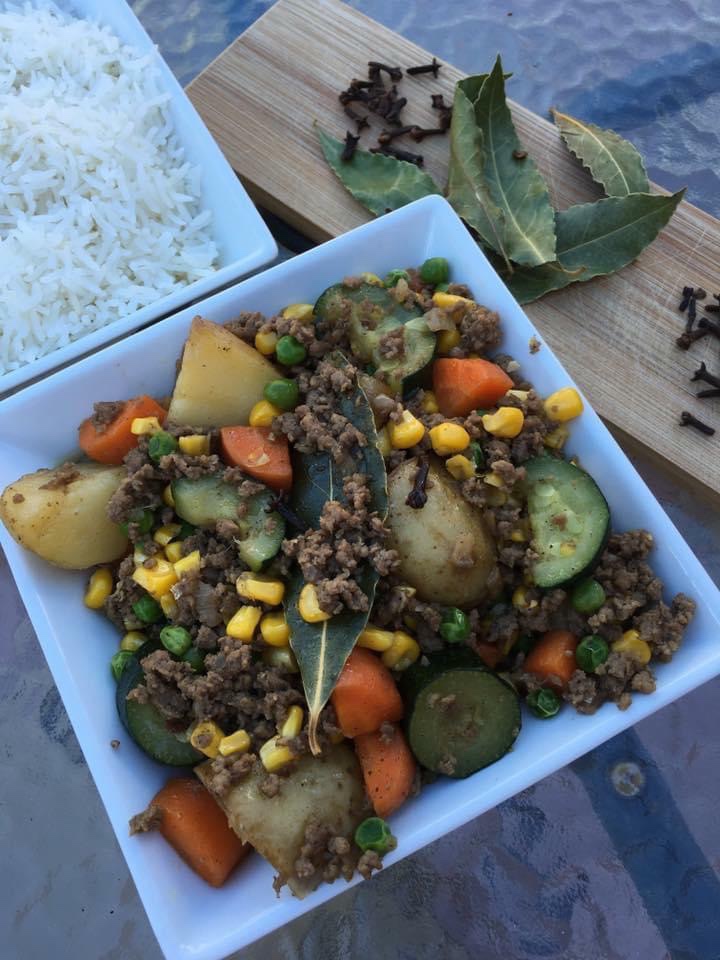
Braised Minced Meat
Braised Minced Meat (gesmoorde mince)
Salwaa Smith – Cape Malay Cooking & Other Delights
From My Kitchen To Yours – keeping our heritage alive since 2011!
Quick, easy and very economical to make. Serve with white rice and atchar or homemade blatjang.
Serves 6
1 kg minced meat
1 tbsp vegetable oil
2 large onions, finely chopped
1 large green pepper, finely chopped
2 tsp finely grated garlic
2 green chillies, chopped
5 allspice
5 cloves
3 bay leaves
1 tsp salt (or to taste)
1 tsp black pepper
1 cube beef stock dissolved in 1 cup hot water (optional)
4 large potatoes, peeled and cut into small pieces
2 cups frozen mix veg or frozen peas
Method:
Heat the oil in a large pot. Add the onion and braise until the onions are very brown. Once the onions are brown add the green pepper, garlic and spices, you may add half a cup of water if the onions are starting to stick to the bottom of the pot. Add the minced meat, stir to separate the minced meat, cook over medium heat until the mince is brown.
Next add the potatoes pieces with the beef stock, if using or water as necessary, cook until the potatoes are semi soft. Add the frozen veg / peas and cook over low to medium heat until the potatoes are soft. You may add more water if necessary. Serve with white rice and atchars or blatjang.

If you like my work or the free stuff on this website and want to say thanks, or encourage me to do more, you can buy me a coffee by clicking here
SUBSCRIBE ► https://youtube.com/c/capemalaycooking
————————————————————————
ADD ME ON:
Facebook: https://www.Facebook.com/capemalaycooking
Instagram: https://Instagram.com/capemalaycooking
Pinterest: https://Pinterest.com/capemalaycooking
Tiktok: https://tiktok.com/capemalaycooking0
Website: https://www.capemalaycookingdelights.com
Online Shop: https://capemalaycookingdelights.com/merchandise/

Seafood Akhni
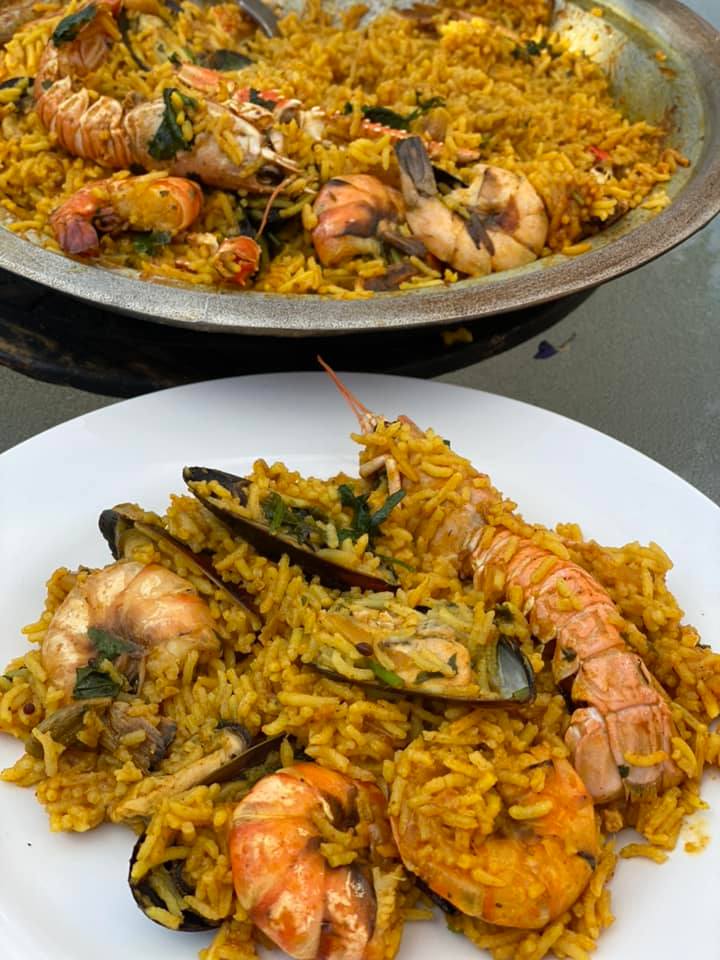
Seafood Akhni
Salwaa Smith – Cape Malay Cooking & Other Delights
From My Kitchen To Yours – keeping our heritage alive since 2011!
Ingredients:
1kg seafood
2 large onions, finely chopped
2 finely chopped tomatoes
50g butter or margarine
5 large whole fresh green chilli, slit open. You may use more or less, depending on your taste
1 Tbsp finely chopped or grated garlic
1 tsp finely chopped or grated ginger
1/2 cup chopped fresh coriander
2 tsp salt, to taste
1 Tbsp red leaf masala/roasted masala
2 tsp seafood / fish masala mix*** see note
1 tsp chilli powder or chilli flakes
1 heaped tsp ground cumin
1 heaped tsp ground coriander
1 heaped tsp turmeric
3 cups of basmati rice or long grain white rice
1/4 cup cooking oil
2 bay leaves
3 cardamom pods
2 pieces of stick cinnamon
3 all-spices
3 cloves
1/4 cup of lemon juice
1/2 cup of plain yoghurt, Greek yoghurt
Method:
Cook rice 3/4 finish and put aside.
Warm a pot on the stove. Add butter and oil. Braise the onions with the whole spices and garlic. Add the dry spices, the tomatoes, lemon juice and cook for about 15 minutes before adding a cup of water and the yoghurt. Stir through.
Add rice and mix well. Layer seafood on top of rice add another 1/2 to 1 cup of water, depending what kind of rice you using. I always use basmati or a long grain white rice for akhnis or breyanis.
Dot with butter and sprinkle a good handful of freshly chopped coriander leaves. Cover with lid. Cook on high for 5 minutes. Turn the heat off, leave covered for a further 5 minutes before serving.
Enjoy!
I cooked this akhni over the BBQ coals outside. The exact same method can be use to cook on the stove top.
Find my fish masala recipe here ➡️ https://capemalaycookingdelights.com/category/seafood/

For more Cape Malay Cooking recipes please subscribe and press the notification button: https://www.youtube.com/capemalaycooking
Follow me on social media:
INSTAGRAM: www.instagram.com/capemalaycooking
FACEBOOK: https://www.facebook.com/capemalaycooking
TIKTOK: tiktok.com/capemalaycooking0
Subscribe to my website: www.capemalaycookingdelights.com

Peppermint Fridge Pudding
Salwaa’s Peppermint Fridge Pudding

This dessert recipe is delightfully simple to create! Peppermint Pudding is a traditional South African dessert that comprises a coconut biscuit base, creamy caramel and mint chocolate layers. Peppermint Fridge Pudding sometimes referred to as a Peppermint Crisp Fridge Tart is a must for the holidays! Here’s my recipe.
From My Kitchen To Yours – keeping our heritage alive.
Makes a large pudding or 10 individual servings.
Ingredients:
250ml fresh cream
1 tin (410g) caramel
1 big slab peppermint chocolate, grated
15ml gelatine dissolved in 50ml warm water, optional
A couple drops of peppermint essence (optional)
1 packet tennis biscuits, crushed
Method:
Whip the cream until stiff in a large mixing bowl.
Add the caramel, gelatine, half of the grated peppermint chocolate and peppermint essence if using and mix to combine all the ingredients.
Layer the above with the crushed tennis biscuits in a serving dish or in individual portion servings using parfait glasses. Start with the biscuits and ending with the peppermint filling on top.
Sprinkle the rest of the grated chocolate on top and leave to set in the fridge for at least a couple of hours or better still overnight. Serve chilled.
Cook’s Note:
Adding gelatine is optional, I only add it to shorten the setting time.
Visit our online shop www.capemalaycookingdelights.com
All content and media belongs to Salwaa Smith & Cape Malay Delights (PTY) LTD.

Chocolate Fridge Tart
No-Bake Chocolate Fridge Tart
Salwaa Smith – Cape Malay Cooking & Other Delights
From My Kitchen To Yours – keeping our heritage alive since 2011!

An elegant chocolate tart. The bright red of the strawberries and the green of the pistachios goes beautifully with the dark chocolate. This incredibly easy, no-bake chocolate tart is made with a simple Oreo crust and rich chocolate ganache filling made with both milk and dark chocolates.
Ingredients:
2½ packets chocolate cookies (Oreo or similar)
100g butter, melted
350g milk chocolate
150g dark chocolate
300ml fresh cream / double cream
Strawberries for garnishing
Crushed pistachios, optional
Method:
Finely crush the biscuits and mix it with the melted butter.
Line a 20cm non-stick fluted loose bottom tart tin with the biscuit mixture. Use a spoon and your fingers to get an even layer into the bottom and edges of the tin. Freeze whilst preparing the filing.
Using a small pot heat the cream over low to medium. Break the chocolate into small pieces. Add the pieces of chocolate to the warm cream and stir till the chocolate has melted. Pour the chocolate mixture onto the biscuit base. Top with strawberries and crushed pistachios. Refrigerate at least 2 hours or overnight before serving.
Cook’s Notes:
It’s best to use a dark chocolate which contains 50-90% cocoa solids, cocoa butter, and sugar. For best results make the tart a day in advance. This chocolate tart will keep, covered well, for up to 4-5 days in the fridge, but I guarantee it wont last that long!

If you like my work or the free stuff on this website and want to say thanks, or encourage me to do more, you can buy me a coffee by clicking here
SUBSCRIBE ► https://youtube.com/c/capemalaycooking
————————————————————————
ADD ME ON:
Facebook: https://www.Facebook.com/capemalaycooking
Instagram: https://Instagram.com/capemalaycooking
Pinterest: https://Pinterest.com/capemalaycooking
Tiktok: https://tiktok.com/capemalaycooking0
Website: https://www.capemalaycookingdelights.com
Online Shop: https://capemalaycookingdelights.com/merchandise/
All content and media belongs to Salwaa Smith & Cape Malay Delights (PTY) LTD

You must be logged in to post a comment.